Showing posts with label crafting. Show all posts

Sunday, July 14, 2013

A Foray into Rings


If at first you don't succeed try try try again!  My foray into rings is a work in progress.  With each ring I make I am getting closer to my ideal design, but until then I am learning from my misdirections.


My plan was to do something similar to the bracelet design, so the supplies are roughly the same.  However I also learned that I needed to add a ring shaper to my tools for the future (something like the copper stick below)--for the time being I improvised with a couple of highlighters/fat pens and repeatedly trying the rings on.

Supplies (previously purchased at Beads on Fifth or off Ebay):
  • Wire cutter
  • 18 gauge wire (gold color copper; tarnish resistant craft wire from Bead Smith)
  • 28 gauge wire (14kt gold filled)
  • Semi-precious rough cut garnets
  • Rhodonite round pink beads
  • Rough cut dyed jade

Ring 1
First I wound the 18 gauge wire so it overlapped 2 full times and then for about a cm 3 times.  Nexy I wound the 28 gauge wire around the doubled 18 gauge base.  I position where I anchored the three stone beads over the tripled up 18 gauge wire.  I think that creates a more streamlined look since that area of the ring is already distinct from the rest of the circle.  I found because the tripled up area was small that I had to do some extra wrapping of the beads to anchor them properly and avoid the ring base from continuously increasing in size.

The finished product, ring 1.  While I think it worked out well, in the future I'd like the reduce the "bulk" of the anchoring of the stones.  I much prefer a more streamlined look.  This may requiring looping through the bead twice to create a firm attachment.


Ring 2
This was my attempt to address the issue of expanding ring size.  This design contemplates a third full loop of the 18 gauge wire, but I decided to play around with the wrapping of the 28 gauge to create some interest.  I alternated between wrapping the top two and the bottom two wires.  While I do think this helped a lot with reducing risk of expansion, I am not in love with the resulting look.  It looks haphazard even though it was planned, in that I could each set top or bottom 28 gauge loops.

Another interesting lesson from ring 2, the use of a larger number of beads results in a "crown" look when worn.


Ring 3

My final product in this series.   For this ring I made a very conscientious effort to keep the ring size small and bulk minimal.  Towards this vein I decided to wrap the 18 gauge wire only once (with only partial doubling up).  In order to anchor the base so it would stay the same size I wrapped both ends of the 18 gauge (2 times) around the single loop and then wrapped the 28 gauge wire on top.  Some modeling with a matching shade of nail polish! But I won't be keeping this ring as it will be a belated birthday present from my friend Jane P. who has always encouraged my craftiness.


Saturday, June 8, 2013

Wire Wrapped Bracelet

Just because you are not the *BEST* (or even very good) at something doesn't mean you shouldn't do it.  The inner perfectionist in me that I'm almost certain I shook off sometime in 1st grade, still peeks out from under layers years of becoming more outgoing and confident.  In the interest of making this blog more of a personal betterment project, I will try to post a personal thought along with each craft / thrifty entry.

A perfect segue way into any craft project, as what I love about crafts is the process of making and the pride of completion.  If I or someone else can use it, then its reason for existence has been met.  It does not have to be the "best" craftsmanship or design, just something that "works".

I have been thinking for a little time now about bracelets and also expanding from my earring projects.  I don't wear much jewelry, and what I do wear is almost constantly on (a ring and a necklace).  So earrings and bracelets are areas where I find most flexibility for expansion.  A problem I have had with many is that many one size fits all bracelets run too large for my wrists.   For my first bracelet project I wanted to make something that I could slip on and off when I wanted to but did not fall off easily.

I decided to work on a design that was similar to the wire wrapped earrings I've gotten into making in the last year.  Perfect because I already had most of the materials.  I considered purchasing new bracelet sized wire that is made not to lose its shape, but decided just using thick wire wrapped twice would work just as well for my purposes, and better yet I had some among my supplies.  As it will be completely covered in the finished project I was not concerned with material content.

Supplies (previously purchased at Beads on Fifth or off Ebay):
  • Wire cutter
  • 18 gauge wire (gold color copper; tarnish resistant craft wire from Bead Smith)
  • 28 gauge wire (14kt gold filled)
  • 6 Semi-precious rough cut strung stones (garnets)
I "measured" the size I wanted by slipping the doubled wire on and off my wrist.  This came out to a wrist to bracelet circumference ratio of 5.5/7.5 (but will ultimately depend on your hand size and how much you can or how much you are willing to contort).
*TIP:  When the measuring tape has gone missing (or never existed in your too box) always helpful to keep string around to check measurements.

I looped the 18 gauge strand around twice with just over an inch overlap.  The nice part about 28 gauge wire is that where you start really just disappears into the project.  I began with a decent strand unwound from my spool and wound that end to completion, then started with the longer end.


I ended up using one continuous strand of the 28 gauge, which required some carefully wrapping (to avoid tangling)--this is probably not absolutely necessary because the wire blends nicely when doing tight wrapping but I generally like to do so and hopefully in future projects I will figure out some tricks to streamline the process.  A little before halfway through winding (make sure to regularly push the loops towards the already made loops), I threaded in a few beads and and anchored them with a few winds in between each for spacing.  I positioned the winding so the beads would fall along the wider 3 thickness portion of the 18 gauge band.  Then, I finished the project by winding the 28 gauge around the remaining half of the band.

Monday, March 26, 2012

Newest earring creations


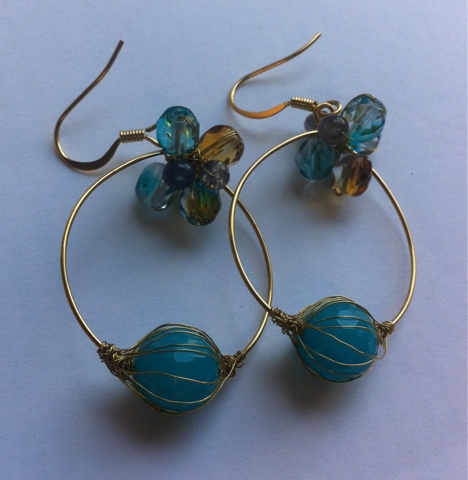
After deciding to open up my own etsy store (http://www.etsy.com/shop/emilushop) I've finally gotten around to making and photographing enough "inventory" for a grand opening or more accurately announcing to my friends.

My latest creations below. I'm currently quite intrigued with wire wrapping.
 

Thursday, January 19, 2012

More mosaics


  This time little box for my friend's birthday.  My cousin recently gifted me some pretty tiles she found for sale at a farmer's market.  Unlike my prior mosaic adventures, for the first time I was using "scrap" glass.  While I did not have the pleasure of speaking to the supplier myself, these were clearly remnants and pieces of broken colored glassware.  Some appeared to have spent some time in the tumble to remove sharp edges too.  I had fun looking at the variations of color.  But it was difficult for me to do any non-abstract design as the pieces are not uniform in depth and were larger that prefabricated tiles.  In the end I decided to sort them and create a gradient color scheme.  I was actually surprised that I ended up using most of my stash.  Glass goes fast with closely arranged patters I suppose.
   The underlying box was purchased at Joanns, and the grout was left over from my prior project.  I decided to deepen the color of the wood with few coats of rub on stain that I picked up from home depot (used on my coffee table project).  And I am quite pleased with the end result.  I hope my friend is too.  Also it made for a perfect holder for the other presents I found for her: a few bottles of OPI polish from the Muppet Collection (from Nordstrom Rack) and the most darling tiny "pitchers" (single serving milk holders) in the shape of an elephant and bunny (from Beacon's Closet)

Thursday, November 17, 2011

Handmade Jewelry: Earrings

  
Buying Supplies
This can easily add up very quickly so I like to try to have a project in mind before I start dropping $$.  I am currently working in gold tone metal, but I think I may try gold fill in the future.  Here are the supplies I either already had or purchased for my project.   I already have a set of tools so there was no additional cost there, but wire cutters and shapers can be found at any craft/jewelry making store or even hardware store!
Designing & Executing
whew!  they match
working my way around the loop
I decided to go for something relatively simple without much wire bending.  I tend to design on the fly, as I go along--as a result I spend a good amount of time adjusting and undoing (i.e. ill fated alternating purple colored beads... looked clownish).  Earrings are always tricky when there is a lot of working or detail simply because the pair needs to match (or at least that is usually the goal).  I decided to go with alternative small blue faceted beads and gold tone seed beads, with a large droplet facet cut stone in a charcoal.  I didn't need to worry much about spacing as the beads occupied more or less the entire round.  The excess I used to connect to the hooks.
The finished product

Another Project
This time with tumbled green stones, gold tone wire, and small floral metal beads.  This look was achieved through lots of wire wrapping.

Wednesday, November 16, 2011

Sewing: 50s style dress


When I first found this pattern I knew it was perfect for me.  Full circle skirt, cute bias detailing, overall vintage 50s look.  As I am still a beginner sewer I limited myself to a more manageable cotton fabric.  Generally I tend to shop on ebay for fabrics, because the variety is vast and I am still a little intimidated by the fabric outlets in NYC's fashion district.   Plus I was able to get 5 yards of this fabric for a good price.

The bias tape was also from a nice ebay seller (wenze001) who I believe makes her own "tape".  This way I was really able to match the color well.  Although I did buy both a bright orange and a green and decided to make the choice in person.  

In the end I went with green, and I think it was a better fit for the vintage/traditional design.   I wish I had taken more photos of the process but it was a pretty simple pattern with basic steps.  Cutting pattern, cutting cloth, sewing darts, etc.  Here it is before I added the bias tape.  I must admit I don't use the dress form at all for sizing purposes, but this did come in good use to hang the garment so the fabric could settle before I worked on the hem.  Considering its been used as a glorified coat rack for most of the years I've owned it, it's actually moving up in functionality at least.   Next with bias added.

I headed over to M&J Trimming on 6th Ave which is just a WONDERLAND of notions.  Not cheap, but they seem to have everything jammed into the store from floor to ceiling filled with buttons, trimming, ribbon, applique, etc etc.  I picked up these darling green buttons ($2 each) and a package of large snaps ($7 package).
detail of the buttons
Here is the finished product!  I'm quite proud as this is the first dress I have made in years, and first dress that I actually really was careful about seams, hems, overlocking the edges, etc.


arm loop created by wrapping of fabric

Tuesday, November 15, 2011

Amigarumi: Part 2

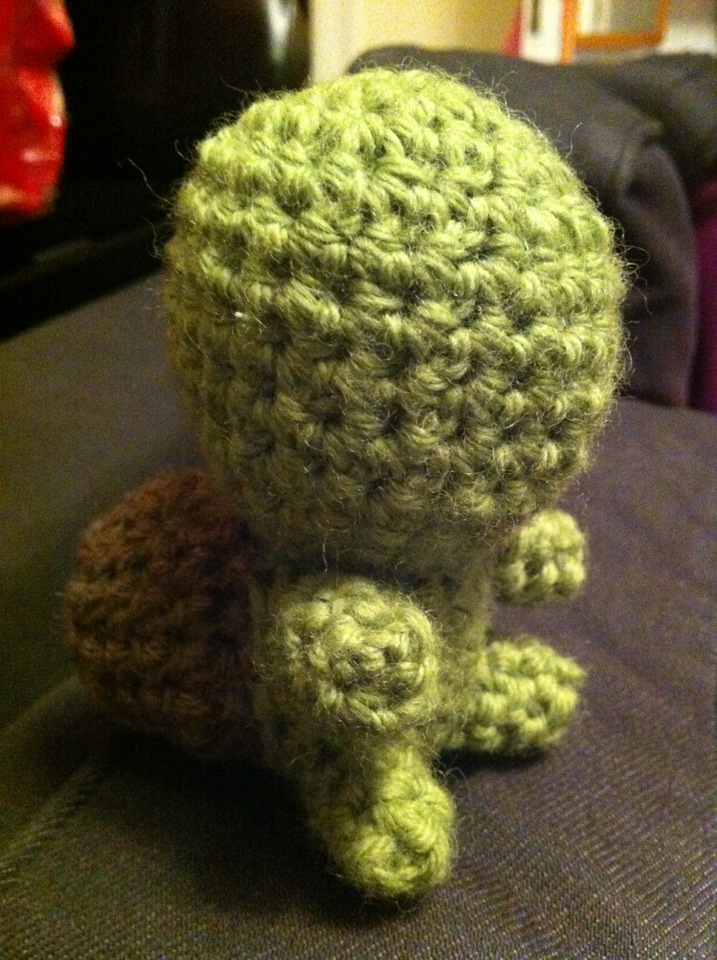
More amigarumi.  This time two cute animals for my sister and her husband.  The tiny legs for the turtle and the never ending tentacles for the octopus were the most frustrating.  I purchase safety eyes on ebay so that once I feel comfortable my stitches are tight enough I can start gifting to the babies that have been increasingly popping up in my family and friend circles =D.


Wednesday, November 9, 2011

Amigarumi: Part 1

Lately I have been dabbling in a little amigarumi ("little animals"), a genre of crocheting that can only be described and ridiculously cute.  Armed with some basic crocheting stitches and a good instruction book + some slow motion instruction care of youtube, I set forth on making an elephant.  This is how we turned out....

First shot missing his limbs!

Size wise he ended up a little larger than I originally anticipated (shown next to a finger puppet) in part due to using a larger crochet hook, but also I think the project was just a bit larger than I thought.

Here he is all finished up and handsome, and with a fetching green scarf, he's ready for the winter! 

Monday, July 4, 2011

Sewing Class and Choosing fabrics on Ebay

My latest crafty activity has been attending an 8 part introductory sewing course held by the Sewing Studio located on 134 West 29th Street in Manhattan.  The class meets once a week over 8 weeks, during which we learned how to make a drawstring satchel, a zipper pouch and a skirt from a pattern of our own choosing. My favorite part has been choosing the fabrics and who I will be gifting them to.  I found the PERFECT match from my friend Jen in this cupcake faced playful design.  I just love the expressions!


Similarly this owl design was a perfect fit for my pink and owl loving friend Jane.  I think it's important to choose fun prints and useful designs.  For me crafting is about using the products and I very much hope my friends will be using theirs!

Ebay is a great source for unique fabrics, but searching can be quite difficult as there are tens of thousands of prints and no consistent naming, labeling or photoing conventions.  Here are the steps I used to find the prints I ended up with.

(1) Material: I knew I wanted to work with cotton, so this eliminated a large number of fabrics right of the bat.  Using the search term "cotton" can be too restrictive (unless searching the description as well).  Cotton also pops up as an ebay characteristic if you are in the fabric sub-category.
(2) Topic: I found it easiest to start with an idea in mind.  I actually began my search for a Russian Doll print, followed by some animal related searches.  I think this was helpful to give me a sense of the types of fabrics that were available on ebay.
(3) Designer: I actually ended up finding both fabrics via designer name.  I had seen the names "Alexander Henry" and "Robert Kaufman" pop up several times among fabrics I found to be attractive for the projects I had in mind.

In the end I chose a cupcake print by Alexander Henry and an owl print by Robery Kaufman.   In determining how much fabric you need I think it's always wise to get a little extra because once it's cut it's cut and shipped and on its way to you.  Also when buying multiple increments (i.e. by the yard) make sure the seller is selling you a continuous piece.  Lastly a tip for the total novice a "fat quarter" is simply a quarter of a yard of fabric, but cut once length wise and once horizontal wise  (thus you have a squarish/rectangular piece, rather than a very thin and narrow piece of fabric).  Happy online fabric shopping!