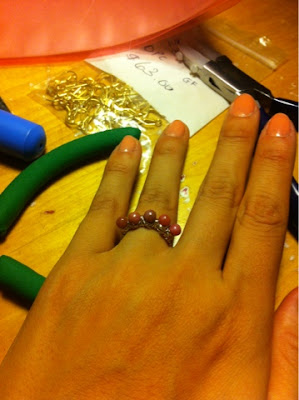
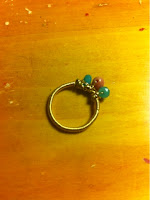
If at first you don't succeed try try try again! My foray into rings is a work in progress. With each ring I make I am getting closer to my ideal design, but until then I am learning from my misdirections.
My plan was to do something similar to the bracelet design, so the supplies are roughly the same. However I also learned that I needed to add a ring shaper to my tools for the future (something like the copper stick below)--for the time being I improvised with a couple of highlighters/fat pens and repeatedly trying the rings on.
Supplies (previously purchased at Beads on Fifth or off Ebay):
- Wire cutter
- 18 gauge wire (gold color copper; tarnish resistant craft wire from Bead Smith)
- 28 gauge wire (14kt gold filled)
- Semi-precious rough cut garnets
- Rhodonite round pink beads
- Rough cut dyed jade
Ring 1

 First I wound the 18 gauge wire so it overlapped 2 full times and then for about a cm 3 times. Nexy I wound the 28 gauge wire around the doubled 18 gauge base. I position where I anchored the three stone beads over the tripled up 18 gauge wire. I think that creates a more streamlined look since that area of the ring is already distinct from the rest of the circle. I found because the tripled up area was small that I had to do some extra wrapping of the beads to anchor them properly and avoid the ring base from continuously increasing in size.

Ring 2
This was my attempt to address the issue of expanding ring size. This design contemplates a third full loop of the 18 gauge wire, but I decided to play around with the wrapping of the 28 gauge to create some interest. I alternated between wrapping the top two and the bottom two wires. While I do think this helped a lot with reducing risk of expansion, I am not in love with the resulting look. It looks haphazard even though it was planned, in that I could each set top or bottom 28 gauge loops.


Another interesting lesson from ring 2, the use of a larger number of beads results in a "crown" look when worn.


No comments:
Post a Comment